Related Video:
End Goal: To have a fully automated solar panel system that maintains the health & welfare of all animals stowed there.
The time has finally come to move all of my animals to a larger, more comfortable space as their current location is becoming crowded. As I’ve grown my collection I’ve known that eventually I’d move to another space & that it’d have to be automated per the usual, which is where project Aurora comes in.
Aurora is a solar panel based project that uses the energy from the sun in order to power all arduino boards. The intent is for this to be a long term location for the animals as not only my collection grows but my programming abilities as well. I’d also like to spruce up the overall facility it’s in with a lighting system, office desk, & move my programming table out there as well. For now, here are the overall requirements for Aurora.
Subsystems Required:
Solar Panel Electrical System (& backup)- Generates electricity via solar panels for storage in batteries connected in parallel & in series. Has a backup battery to provide power to Arduino subsystem to alert owner via low power systems & charging of the backup battery which doubles as a battery for the generator.
Charge Controller Activity Monitor- Independent Arduino subsystem that monitors if the primary system is active or not.
Generator Fuel Delivery System- Activates via generator remote if solar batteries are too low and load disconnected by the charge controller.
AARCS Unit- Automated Animal Residency Control System is used to maintain animals inside their cage. The heat, water & ventilation is all controlled by automation.
Modified Castle Guardian- Actively monitors enclosure for security.
Each subsystem is a gear that makes the overall system work as without a simple subsystem working the overall project can go nowhere. Additionally, each subsystem can be broken down to a simpler form as there are requirements for each subsystem to work appropriately, though things will get too muddled if I began listing each subunit making a subsystem at this point in the text. I will eventually get into how it all works, but for now I will provide the overview.
Implement Phases:
1. Major Purchases- Buy batteries, solar panels, generator (w/ oil & gasoline), magnets, & wires alongside a large crimper. This isn’t an exhaustive list of materials but only the things I needed to buy. A full breakdown will be provided soon.
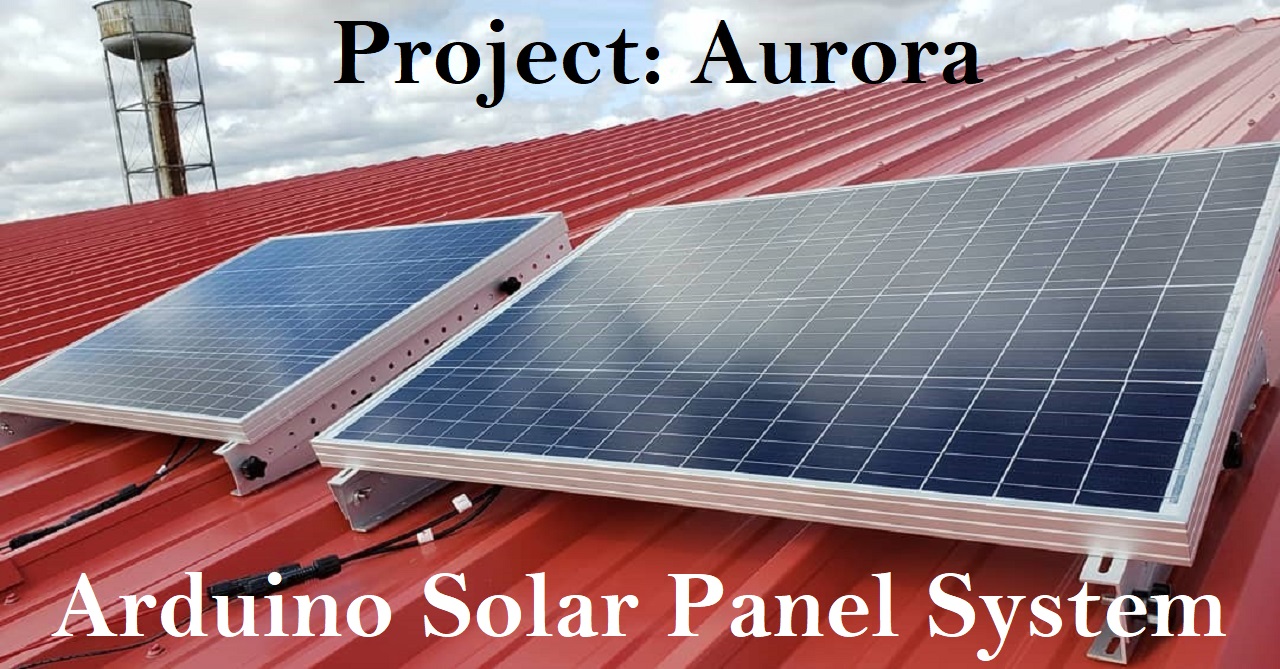
2. Battery Connection- Purchase four 6 volt 235 Ah batteries and connect them in series and in parallel. Connecting them in series boosts the voltage to 12v and connecting them in parallel boosts the available amperage to 470 Ah.
3. Solar Panel Install- Assemble the panel brackets and install the solar panels on the roof with the wires connecting the panels to the charge controller in parallel to boost amperage.
4. Generator Assembly- Assemble generator & provide oil & gas to prevent equipment damage. Order a second generator remote starter so it may be taken apart to interface with the arduino when the primary solar battery system is disabled due to low charge.
A. Install an inverter- relay into generator as generator instructions state to not plug in a load until generator starts. Connect to solar panel section of the charge controller.
B. Attach a vibration detector to generator so arduino system knows if generator properly started.
C. Purchase PVC pipes & create a covered stand that has a light dependent resistor. Place it so that pipe covers low oil light so if generator is started but fails the arduino can check if the problem is with low oil or no gas.
D. Install an exhaust extractor to avoid filling the room with fumes, thereby killing all animals via asphyxiation.
E. Create a fueling system by purchasing several gas cans and linking them to a pump to provide gas as needed. Create a drainage system via solenoids to test if reservoir is filled. If reservoir isn’t filled & low oil light isn’t detected then fill reservoir with gasoline.
5. Sensor assembly- Solder & code all components to needed for sensor & conduct final test.