
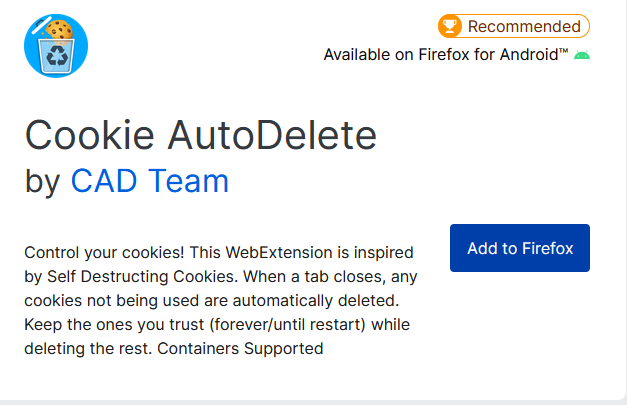
Cookie AutoDelete is a powerful resource that stops cookies from following you around and analyzing your clicks, website visits, and recording what you look at by automatically clearing these cookies by event based rules you establish in the Settings page of the app. Whether you login to a website or are passively checking it out, cookies are loaded into your computer, though it doesn’t always mean its for nefarious purposes. There are several types of cookies that have various danger levels in terms of risk to your internet privacy.
| Cookie Name | Application/ Use | Risk To Privacy |
|---|---|---|
| Zombie Cookie | Persistent Internet Tracking. A regenerative cookie that is hard to remove | Extreme |
| 3rd Party Cookie | A cookie on one website that is hosted on another site. | High |
| Tracking Cookie | Traffic monitoring | Medium |
| Session Cookie | Used to track user data just for that session. Typically deletes upon session end | Low |
| Persistent Cookie | Cookie that stays on a user’s computer even after the session ends | Medium- Low |
| Authentication Cookies | Utilized when logged into a website | Low |
| 1st Party Cookies | A cookie from a website that’s hosted on that website | Low |
The cookie types of themselves have my initial assessment of risk to privacy, but it can be elevated or downgraded when combined or separated with/from other functionalities. For example, if a site were to share aspects of your session with another company it would immediately raise the privacy risk whereas if there’s a verifiable way a company has to deleting all user data upon their departure from a website then it would reduce a cookie type’s privacy risk. Note that these cookies could be used in different ways by different sites and stored in different ways.
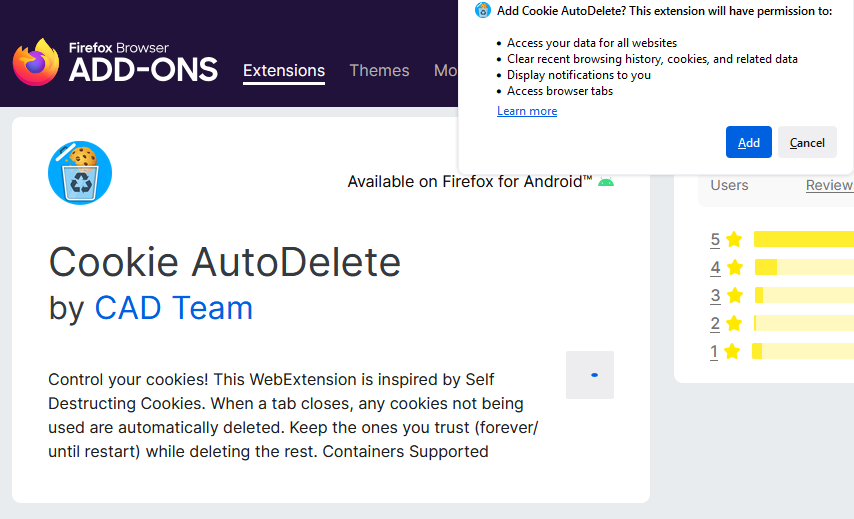
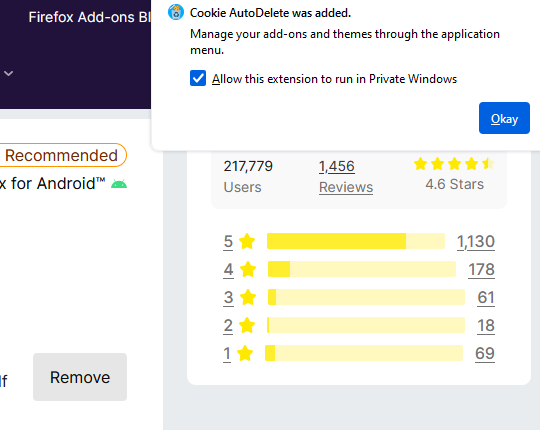
To download Cookie AutoDelete go to your Firefox browser –> Click the three lines in the upper right hand corner of your browser–> Click on “Add ons and Themes” –> Search “Cookie AutoDelete” –> Click “Add to Firefox” button –> Click add –> Select “Allow to Run In Private Windows”
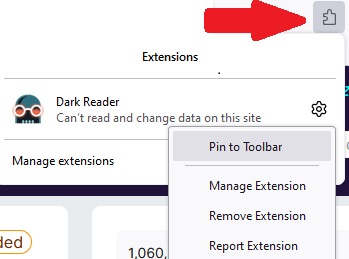
If the app doesn’t auto populate in your toolbar click the add ons button (puzzle piece icon on the upper right hand corner of webpage) to open up a mini panel > select the gear icon next to the downloaded app > Then pin to toolbar (In the example below I’m using Dark Reader but the process is identical)
Once you’ve completed that you can now access the application settings.
First we’re gonna break this down so its easy to understand and you’re not firehosed with information. When you click the Cookie AutoDelete icon the control panel will show up. We’re gonna talk about what’s highlighted in the orange box going from left to right.
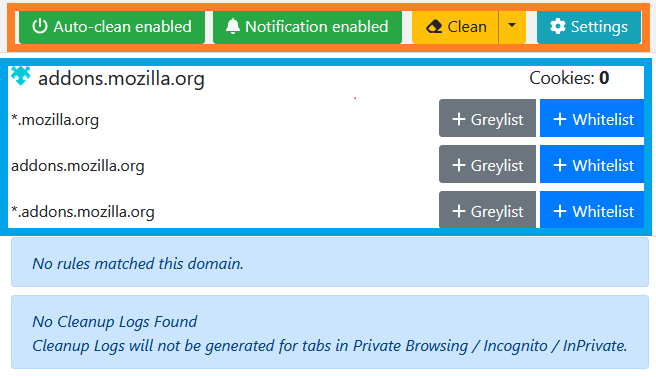
Auto-clean enabled– Auto clean allows the add on to automatically clean up cookies depending on how you have everything set up. If you click it you will disable auto cleaning.
Notification Enabled will allow a popup to alert you that cookies have been deleted. The sub window will also tell you how many cookies were cleaned and where some of them were from. The longer you scroll through websites the higher this number will be.
Clean will tell the app to clean up cookies right now and will have the display of number of cookies in a pop up.
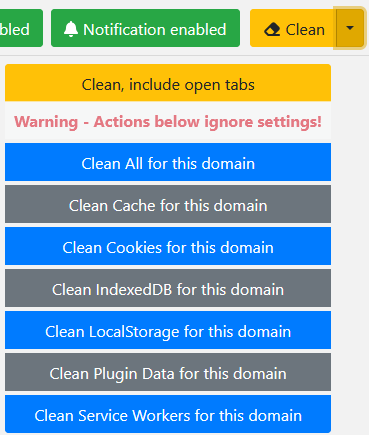
Clean Dropdown–The drop down next to the Clean button opens up a menu to specify what you want cleaned for the domain (website) you’re currently on.
The settings tab allow for explicit instructions for the apps operation. I’d honestly keep things as default, but it is not harmful to look into or change the options. So let’s explore them.
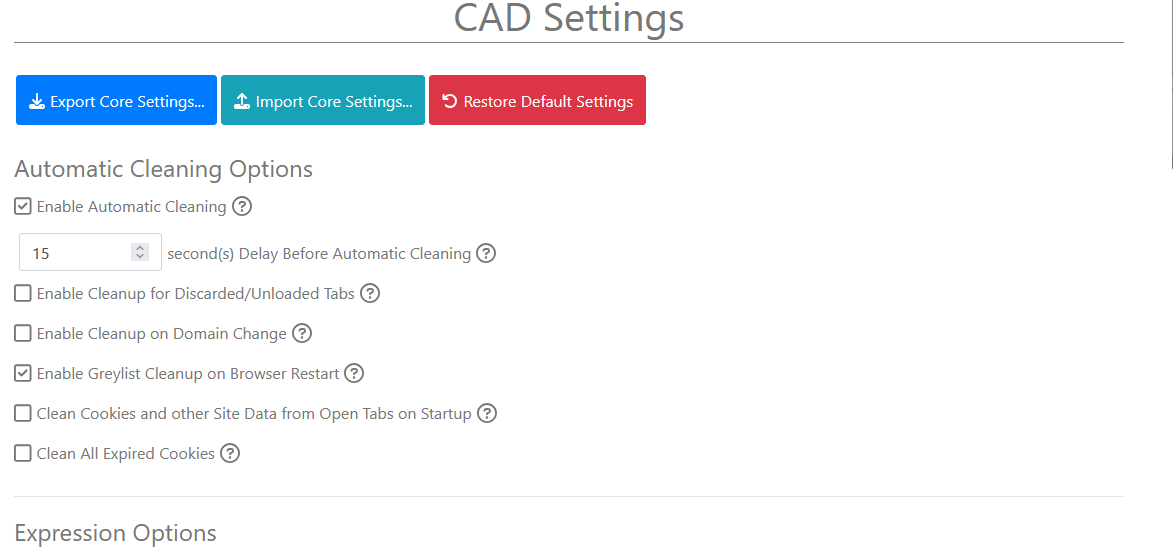
There are more options in the settings page, but I’m providing a snapshot so you know where you’re supposed to be. Most of the settings are self explanatory, but I’ll still cover them and my recommendations on if you should keep or alter the settings.
Enable Automatic Cleaning— Keep enabled so it does its job.
Enable Cleanup for Discarded/Unloaded Tabs— Depends on you and your threat model and how forgetful you are. You could just select the “Clean” button at the end or enable this setting.
Enable Greylist Cleanup on Browser Restart— Keep enabled, its on a greylist its for a reason.
Clean All Expired Cookies— Keep enabled.
Back to the main menu below. We’re now going to discuss the blue box
To the far left you’ll see the domain or website you’re on (in this case: addons.mozilla.org) and below that different subdomains associated with in and the option to Greylist or Whitelist the domain itself as well as its subdomains. Putting any domain type on the whitelist ensures that its cookies are never deleted, which is beneficial when you want to stay logged into a website you visit often such as YouTube or perhaps an e-commerce store like Amazon or Ebay. The asterisk (*) is a wildcard symbol that means any subdomain that ends with whatever follows it can be grey/white listed. For example, if you whitelisted *.youtube.com and there was a subdomain of profile.youtube.com that subdomain would automatically whitelisted. Same goes for greylisting. A domain put on a greylist will not have its cookies deleted unless you restart the browser- as in close all the windows. You can still override this by clicking the clean dropdown and selecting “Clean All For This Domain”
For a more wholistic approach at internet privacy, take a look at how you can use Firefox to Secure Internet Privacy.