Many people start off in the microcontroller hobby by buying jumper wires to electrically connect various hardware to the Arduino and other electronic/electrical components. While an acceptable means of starting out, eventually the expense adds up with each project assembled; especially since you’re unable to customize the wire length. In this article I’ll show you the easiest and most efficient way to make your own jumper wires.
Required Items:
Wire Covers Crimper Male/ Female Wire Heads Black Wiring White Wiring Wire Stripper Red Wiring
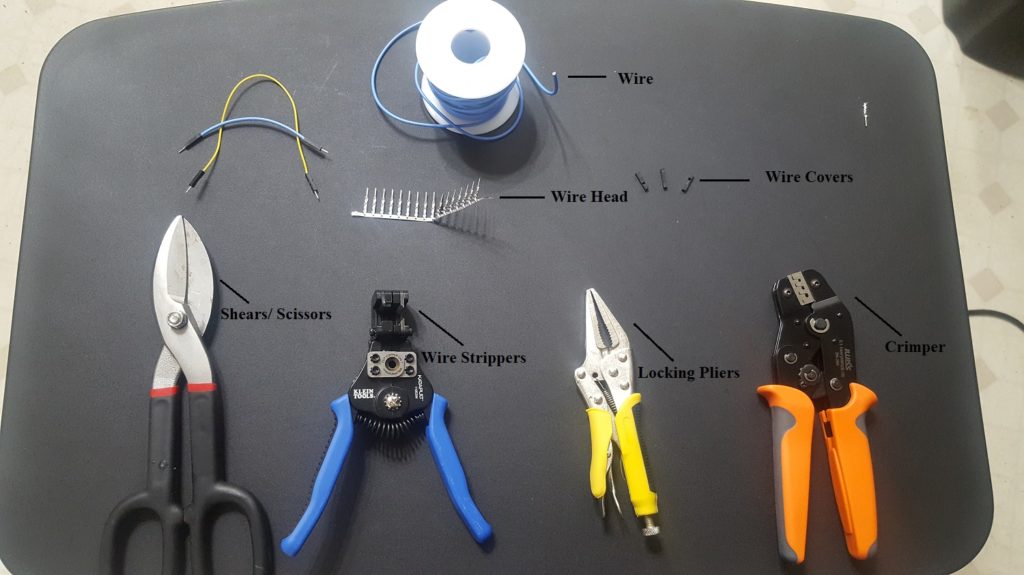
Above are all the tools you’ll need to complete this mini project. If you look at the scissors included in the ‘Required Items’ section, you’ll note they aren’t the same as mine, this is because the linked item is cheaper than the shears I have. While my shears can cut through all but the thickest metal, I see no point going nuclear with simple scissors, so let’s continue on.
Step 1: Understanding The Wire Head
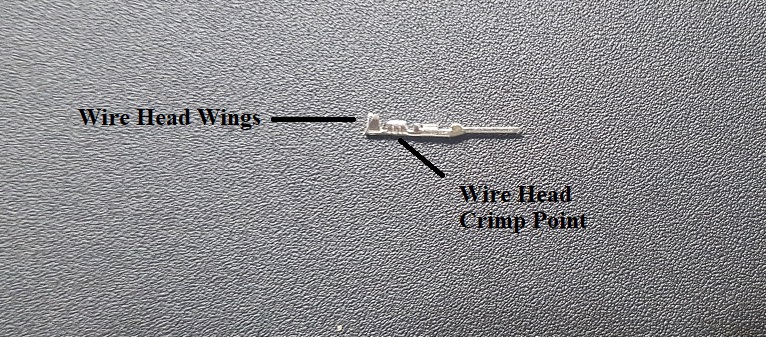
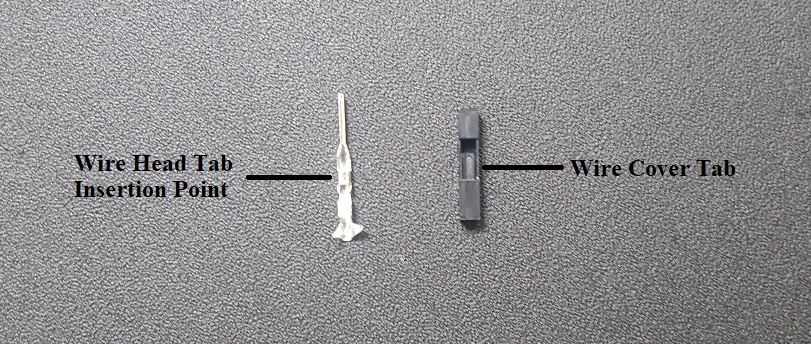
Below is an illustration of the wire head we’ll use for our DIY jumper wire. I’ve taken the liberty to define sections of the head so you will easily understand what parts to pay special attention to as we crimp. The wire head wings must typically be compressed between your fingers to properly fit in the crimper as they’re typically manufactured with their wings spaced out a bit. Once done, you’re ready to crimp!
Step 2: Understanding The Wire Stripper
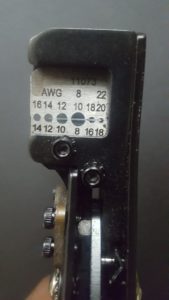
The wire stripper face is marked with various wire gauge sizes to show which wires go in which receptacle; the smaller the number, the larger the wire. Being that your wire is 24 gauge and the closest we see is 22 gauge we’ll use that receptacle as I’ve tested it and verified it works.
Step 3: Stripping the Wire
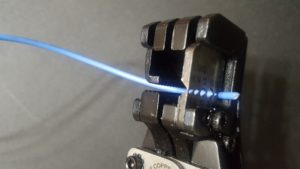
Insert the wire into the 22 gauge receptacle, ensuring you have a small amount sticking out as depicted below. There isn’t a specific length I aim for as I get the right amount from simply eye balling it. It took about 5 minutes for me to perfect it, but if you must have a specific length then approximately 1/4 of an inch will do you well.
Step 4: Crimping And Completion
With your wire now stripped, insert the wire head into the last set of the crimper’s teeth with everything except the wings and crimp point showing. Each set of teeth have grooves, making it easy to nestle the head in without it falling as you slowly close it. Once you have enough tension so that the crimper has a hold of it stop and insert your wire from the back of the head where the wings are. Fully close the crimper and let go. If done correctly, the wire head should stay connected to the wire upon giving it a quick tug. If it does slip out, no worries, cut that end off with your scissors and try again, it only took me five minutes to get the length down, but don’t fret if it takes you a bit longer. Like I said, a 1/4 of an inch is the perfect length if you can’t eyeball it.

Once you wire passes the pull test then insert the wire into the large end of the wire cover and insert it until the cover tab goes slightly under the Tab insertion point seen below. Do another pull test, using the locking pliers to hold the pointed end of the head as you pull the wire cover back further to allow the tab to fall under the tab insertion point. If this doesn’t work, use the point of your scissor to force the tab below the insertion point and do another pull test.
Congrats! You’re 100% complete making your own jumper wires! Once you get the hang of crimping you can move on adjusting the length of each wire so that it fits perfectly when packing your project into a project box!