Associated Videos:
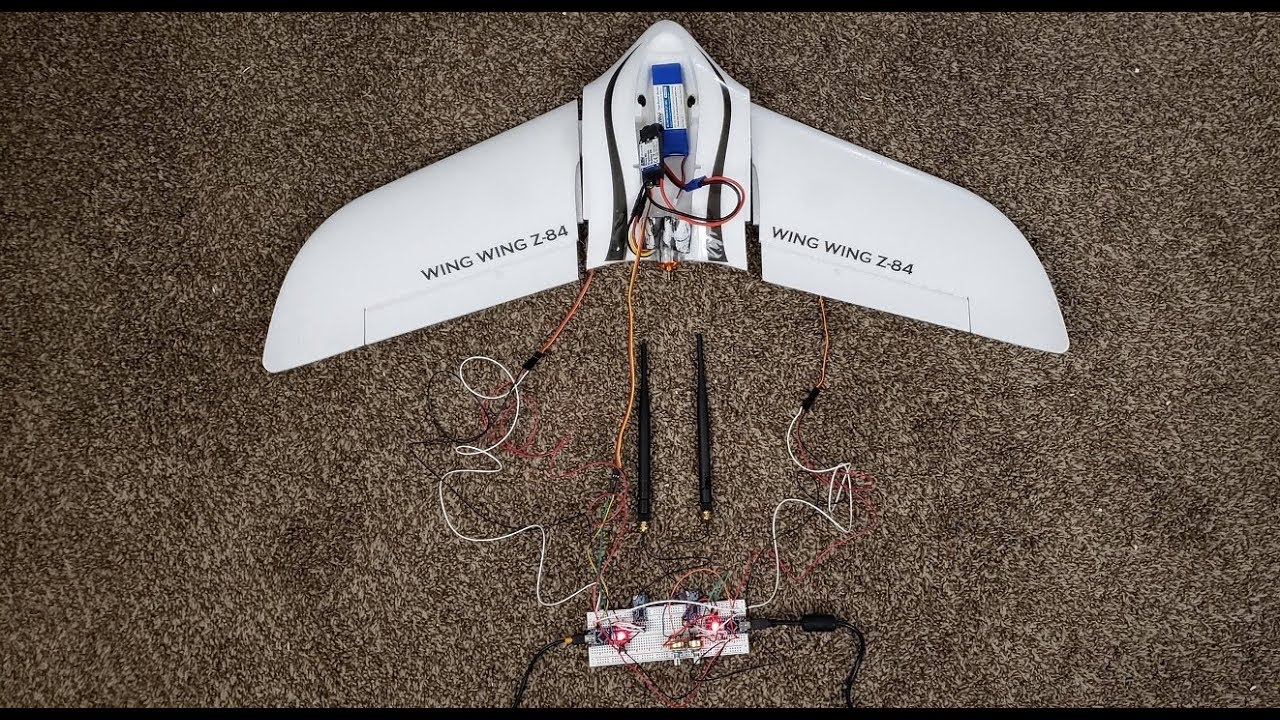
DIY Arduino Controlled Airplane pt. 1
Project AURA Part 2: Airplane Directional & Speed Control with Hc-12
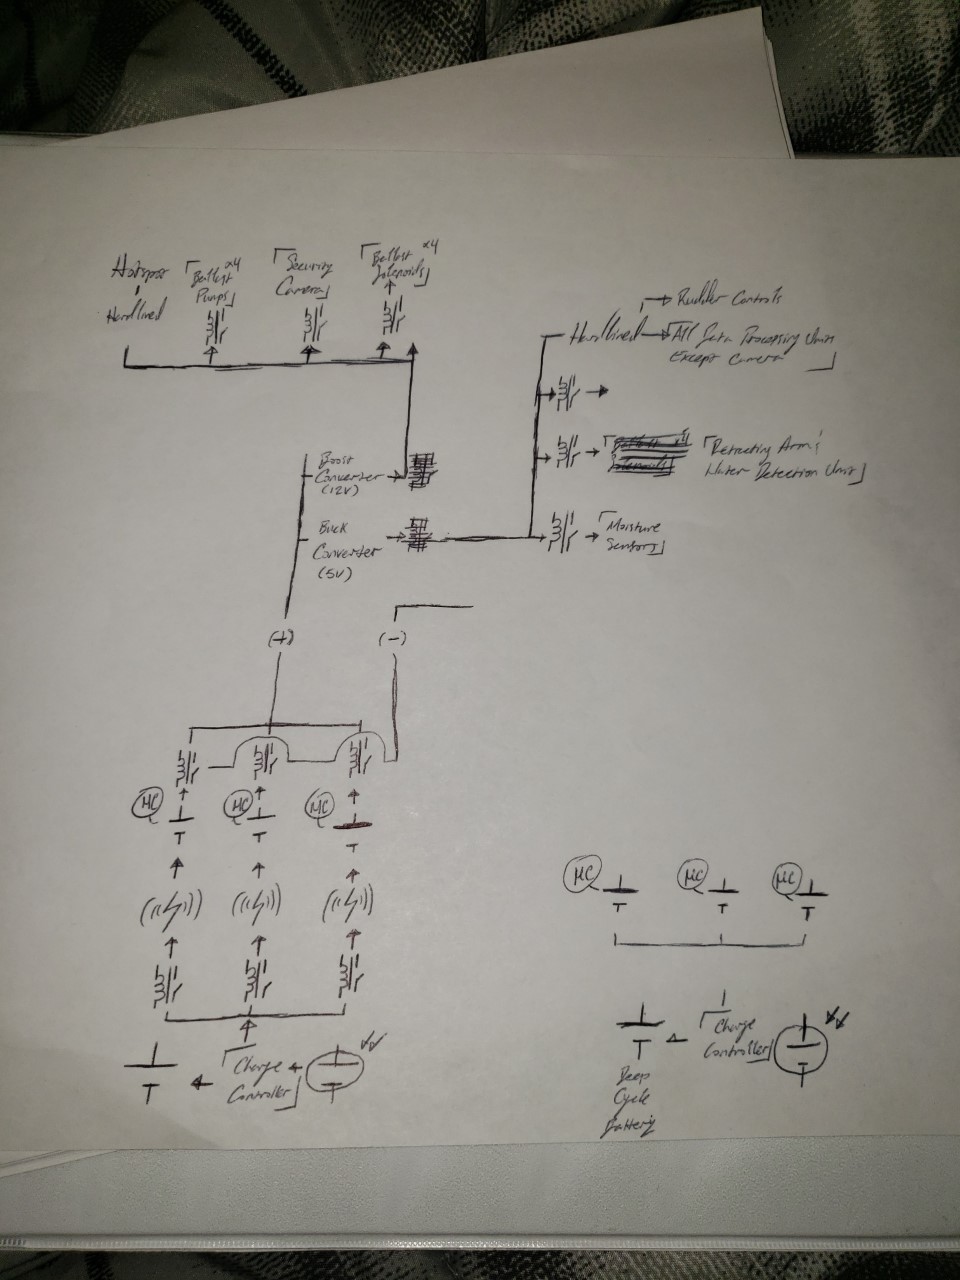
Project AURA stands for the A(utomated) U(nmanned) R(econnaissance) A(irplane), & will be manipulated by the arduino microcontroller without my control. Extensive testing will be required as this will be the replacement for Project ROWAN since there are a lot of timing & construction demands ROWAN requires that I’m not able to give. Though ROWAN is shelved it does not mean that it will be gone permanently, just for the time being. AURA by comparison requires a lot less time & effort being that all I must do is set up the code & conduct testing. Be that as it may, check in weekly for updates on this article since I’ll update the date next to the title as new information is provided.