Whether you’re developing another leg of your OSINT package or new to the world of software defined radio, plane tracking is a cool demonstration of basic signals intelligence without breaking the bank.
Hard/Software
Needed hardware are an ADS B antenna, a band pass filter+ LNA, an RTL SDR, SMA male to SMA male adapter.
Needed software are Windows 11 computer, dump1090, Virtual Radar Server (VRS), Notepad++ & SDR++.
The ADS-B Antenna will receive the GPS coordinates and plane identification data, the bandpass filter will reject all out of band signals and amplify the in band signal, then the RTL SDR/ Windows 11 computer connection ports the data to dump1090– which formats the data into human readable text and the Virtual Radar Server overlays the data with silhouettes, plane data, and map overlay.
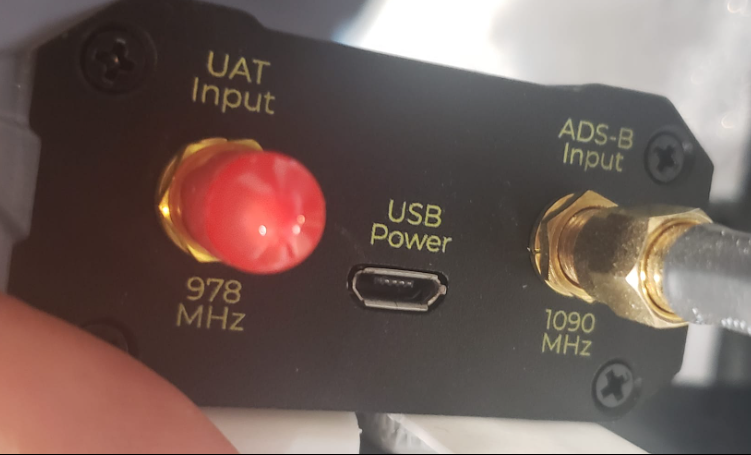
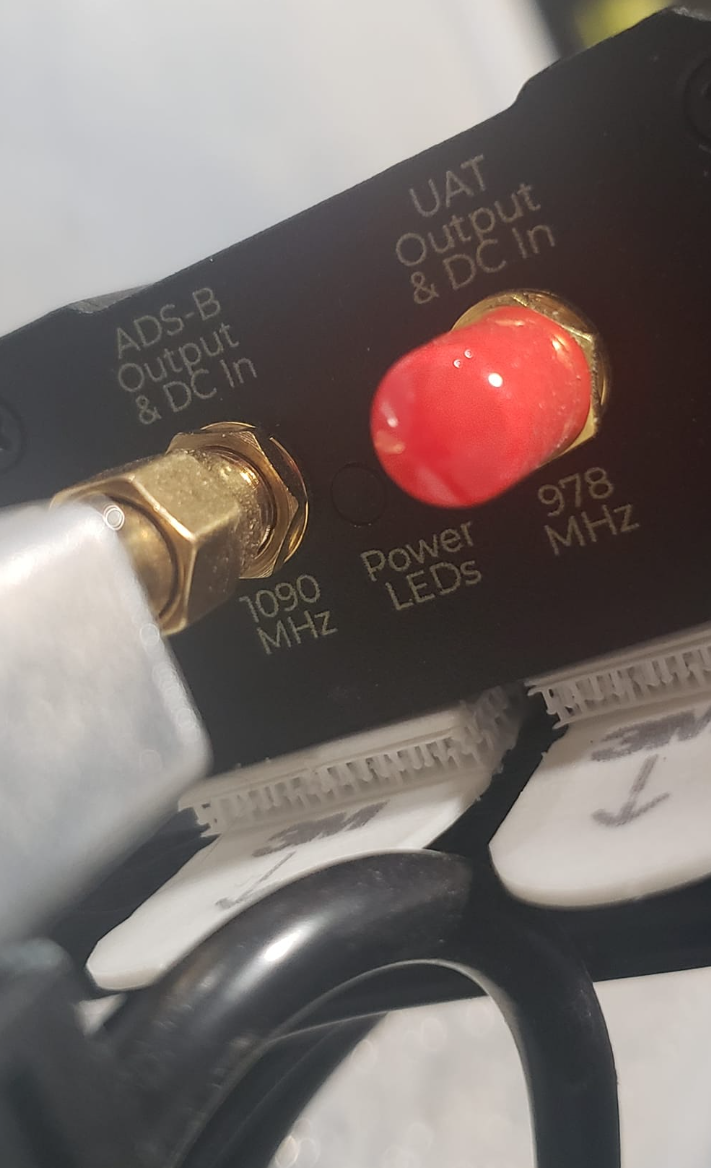
When connecting the SMA side of the ADS-B antenna to the band pass filter, pay attention so that you’re connecting it to the 1090MHz port and NOT the 978MHz portion as seen below. Also ensure that you connect the antenna to the INPUT side of the filter amplifier, not the output.
On the other end, connect the male/male adapter between the output side of the amp filter and the RTL SDR. Note that you can use whatever SDR you want as long as it has a bias tee or you buy a bias tee, but I like the RTL SDR. It also better to minimize the amount of hardware you have so that’s why I’d suggest an SDR with a bias tee, cuts down on cost and clutter. Now you could also purchase an SDR with built in filter, but I plan on using my amp filter for future applications hence it being a separate unit.
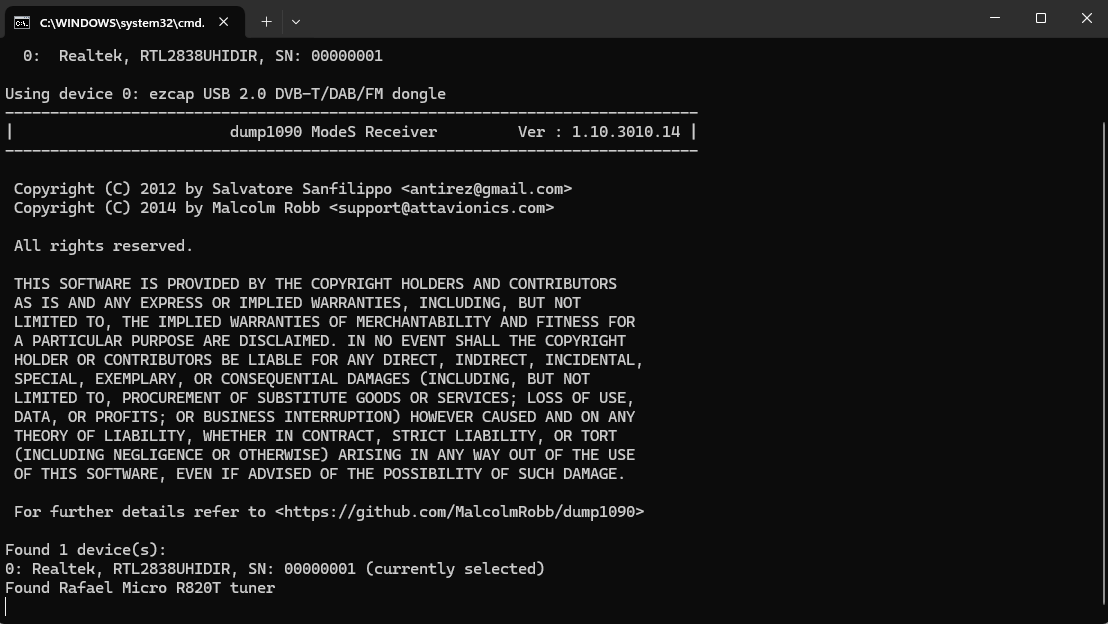
Once you’ve completed that task and subsequent connection from your SDR its time to move to the software portion! First, download dump1090 and Notepad++. Unzip dump1090 and navigate to the dump1090-win zip file. Unzip it and copy the unzipped folder somewhere outside the master folder so its easier to get to. Now, there’s a file missing from the installation and I have no idea why, but its the dump1090d file that tells the program what to do and provides GPS coordinates for the system to know where its at. Navigating to this data access channel go into ADS-B Data > dump1090-win.1.10.3010.14 > dump1090d.bat and download it to your unzipped dump1090 file. Now download Notepad++ so that we may edit the dump1090d.bat file. Hover over the bat file and select open with Notepad++. You should see the picture below.

Type your rough latitude after the –lat and your longitude after the –long section, be sure to save your data and your done with dump1090.
Next, download Virtual Radar Server and in the upper left tabs navigate to tools, then options. After selecting options you’ll see a section under Data Sources for the database filename, flags folder, and silhouettes folders as seen below. Click the three dots to the right of the selection and select the folder for the corresponding section. All the data can be downloaded by accessing the data access channel, going into ADS-B Data > and downloading the OperatorLogos1 and SilhouettesLogos folders in their entirety as well as the Basestation.sqb file. Be sure to download the .RAR files, though you can download the uncompressed files as well. Point to them via the three dots in the Virtual Radar Server.
Nearly done! Now we need to allow dump1090 and VRS (Virtual Radar Server) connections to not be blocked by the firewall, thereby allowing communication. In your windows search bar type “Allow an app through windows firewall” and press enter. Now select “Allow Another App” , “Browse” and navigate to the dump1090d batch file extension and to VRS. Once you have both saved you can close out that window. Now boot up the SDR++ program. If you don’t know what I’m talking about then read my installation guide then come back to this spot. Once complete, open SDR++, select the play button (refresh if you can’t), and navigate to Source > Bias T and click the check box. You should see the amp filter light up, showing that its activated. if not then shut down and reopen SDR++ and try again. Once it lights up close out SDR++ and the amp filter should remain lit. Double click the dump1090d batch file and you should see the loading screen and subsequent plane scanner screen as seen below.

Keep this screen open to maintain connection with VRS, now open VRS and navigate to Options > Receiver Locations > Home and input your lat long as you did for the dump1090d file, do the same in the receiver locations section as well. Navigate up to the “Receivers” section and customize your antenna name and format click the Wizard button. Assuming you made your setup identical to mine you would select that you’re using an SDR, that you’re using dump1090, and that the SDR decoder is running on this computer. Once you click finish the Format option should be auto filled. Now you need to change your port number and select “Test Connection” after increasing the number until you get the prompt saying “A Connection Can Be Made With These Settings, then press OK.
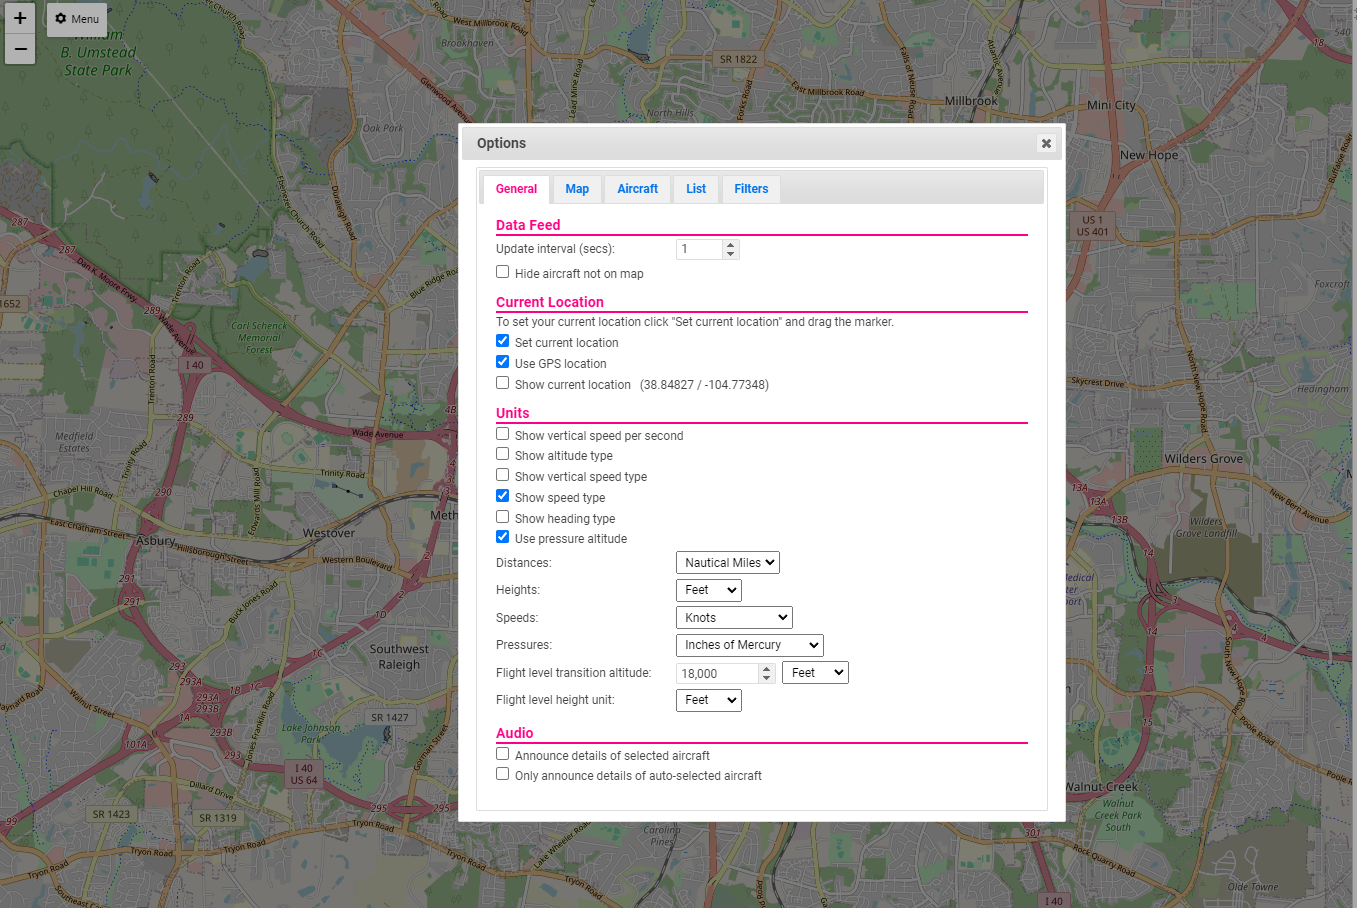
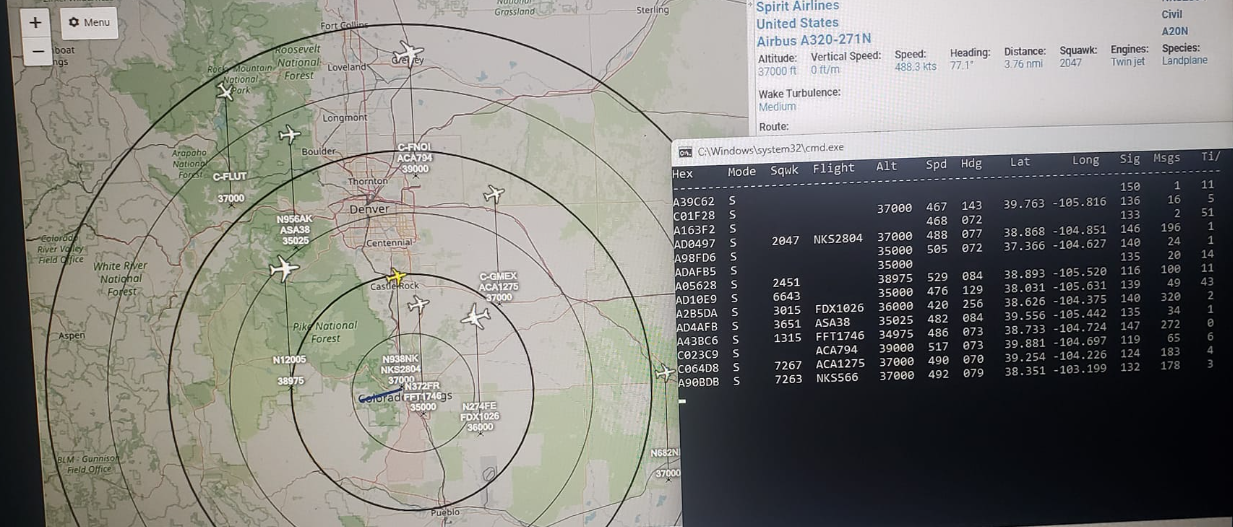
Next click the blue hyperlink that appears in the main screen that ends with Virtual Radar, we need to make our final changes there to be done. Once the map appears click Menu with the gear icon > General> Current Location> And check the “Set Current Location” box. Close that window and in the main map pick up and drop the pin wherever you are at at least the round-abouts. Aaaaaaaand your done as far as mandatory actions go. I would poke around the options screen on your home server (where you changed your location via pin drop) to change display/ menu settings so it suits your comfort. Beyond that go outside and preferably away from large metal buildings and planes should start popping up. Its best to have the antenna high up for better reception, but I’ve gotten a 70 mile detection radius just from being outside at ground level. I also 3D printed my own mast, but nothing some zip ties and hot glue can’t solve. Anyway, these are all the actions needed to setup your ADS-B for plane tracking.
If you’d like an explanation on the filters and antennas being used check out my blogpost on it.